
Assembly Manual for Beautiful by Drew Furniture: A Comprehensive Guide
Welcome to the official assembly manual for Beautiful by Drew furniture! This guide provides step-by-step instructions, tips, and essential information to help you effortlessly assemble and enjoy your new furniture. Let’s get started!
Welcome to the Beautiful by Drew furniture assembly manual! Designed by the talented Drew Barrymore, this collection combines elegance, functionality, and affordability. Perfect for modern homes, these pieces are crafted to enhance your living space while offering durability and style. Whether you’re assembling a chair, TV stand, or other furniture, this guide will walk you through every step. Known for its thoughtful design, Beautiful by Drew furniture is a favorite among DIY enthusiasts and homeowners alike. With clear instructions and step-by-step guidance, you’ll be able to bring your furniture to life effortlessly. Let’s dive into the assembly process and create something truly special for your home!

Essential Tools and Materials Needed
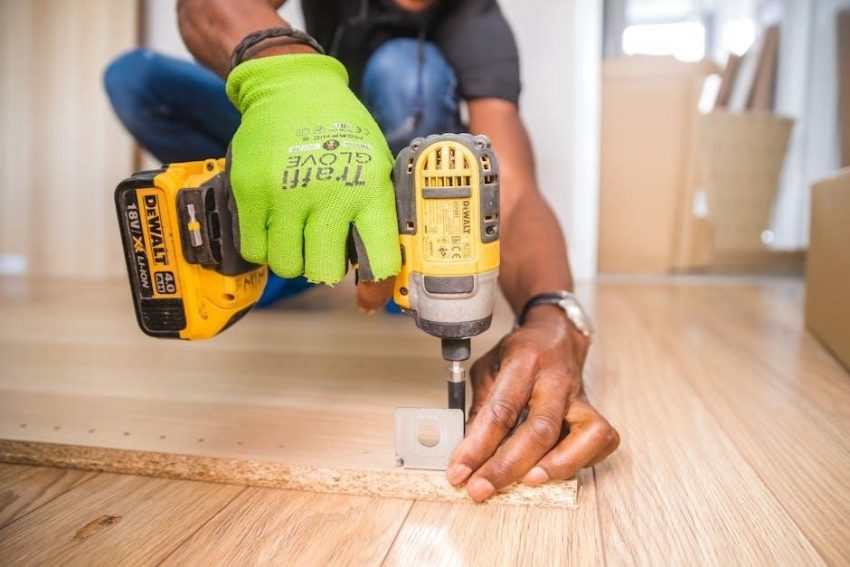
Before starting your assembly project, gather all the necessary tools and materials to ensure a smooth process. The following are essential for most Beautiful by Drew furniture assemblies:
- A screwdriver (both Phillips and flathead)
- An Allen wrench (commonly 3mm or 4mm)
- A rubber mallet for tapping parts into place
- A measuring tape for verifying alignments
- Clamps to hold pieces steady during assembly
In addition to tools, ensure you have all the hardware provided in the packaging, such as screws, bolts, dowels, and cam locks. Refer to the instruction booklet for specific materials required for your furniture piece. Organizing these items beforehand will save time and reduce frustration. Always double-check the parts list to confirm nothing is missing before you begin. Proper preparation ensures a seamless assembly experience for your Beautiful by Drew furniture.

Safety Precautions and Guidelines
Before beginning the assembly of your Beautiful by Drew furniture, it’s crucial to follow safety precautions to avoid accidents and ensure a smooth process. Always wear protective gear, such as safety glasses and gloves, when handling tools or sharp edges. Ensure your workspace is well-lit and free from clutter to prevent tripping hazards. Avoid wearing loose clothing that could get caught in tools or moving parts.
- Keep children and pets away from the assembly area.
- Use tools only for their intended purposes to prevent damage or injury.
- Avoid over-tightening screws, as this may damage the furniture or strip the screws.
- Handle heavy components with care; lift from the knees to avoid straining your back.
Never skip steps or disregard safety warnings in the manual. If unsure about any part of the process, consider seeking assistance or consulting customer support. Your safety is the top priority, and following these guidelines will help you assemble your furniture confidently and effectively.
Workspace Preparation Tips
Preparing your workspace is essential for a smooth and efficient assembly process. Start by clearing a large, flat, and stable surface, such as a dining table or workbench. Cover the area with a protective cloth or old sheets to prevent damage from tools or accidental scratches. Gather all tools and materials in one place to avoid constant searching. Ensure good lighting to see small parts and instructions clearly.
- Unpack all boxes and organize components by category (e.g., hardware, panels, frames).
- Check for any damaged or missing parts before starting assembly.
- Keep the instruction manual within easy reach for quick reference.
- Place heavy or bulky items near the workspace to minimize moving them later.
A well-prepared workspace not only saves time but also reduces the risk of errors. Take a moment to ensure everything is tidy and accessible before diving into the assembly process. A organized setup will make the experience more enjoyable and stress-free.
Understanding the Assembly Manual
Understanding the assembly manual is crucial for a successful furniture assembly experience. The manual is designed to guide you through each step with clarity and precision. It includes detailed diagrams, labeled parts, and written instructions to ensure every component is correctly identified and installed. Familiarize yourself with the manual’s structure, which typically begins with a list of tools and materials needed, followed by a step-by-step guide.
- Pay attention to diagrams, as they often provide visual cues for aligning parts correctly.
- Look for labels or codes on packaging to match parts with their corresponding instructions.
- Some manuals include symbols or abbreviations; refer to the key or glossary if provided.
Take time to review the entire manual before starting assembly. This helps identify any potential challenges and ensures you understand the process from start to finish. If unsure about a step, consult the troubleshooting section or contact customer support for clarification. A well-understood manual is your key to assembling your Beautiful by Drew furniture with confidence and ease.
Unpacking and Organizing Parts
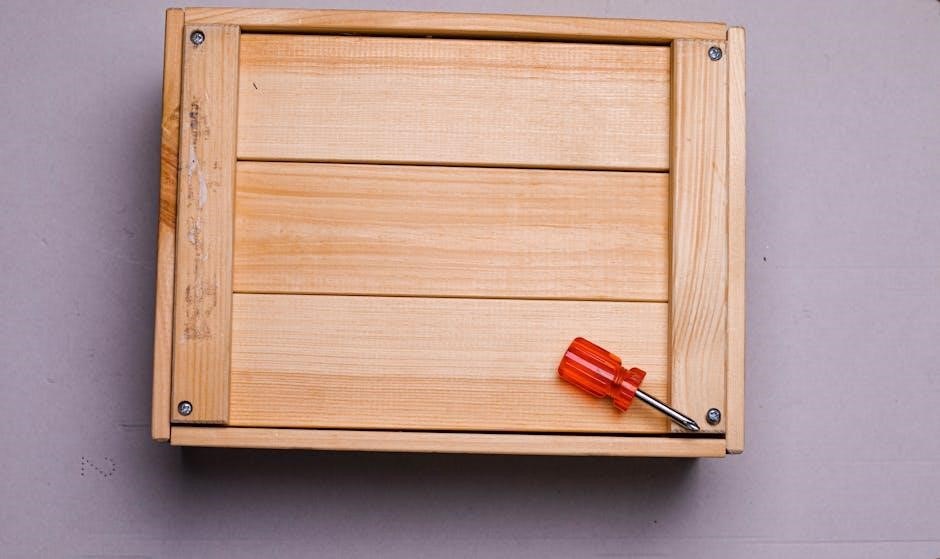
Unpacking and organizing parts is the first step in ensuring a smooth assembly process. Carefully remove all items from the boxes and place them on a clean, flat surface. Inspect each part for damage or defects and cross-reference them with the parts list in the manual. This helps verify that all components are included and accounted for.
- Use labels or codes on the packaging to identify corresponding parts.
- Separate hardware (e.g., screws, bolts, and brackets) into smaller containers or bags for easy access.
- Organize larger components, such as frames or panels, by type or assembly order.
Consider arranging parts in the order they will be used, based on the manual’s instructions. This saves time and reduces confusion during assembly. Handle fragile or pre-assembled parts with care to avoid damage. A well-organized workspace simplifies the process and ensures every piece is ready when needed. Proper organization is key to a stress-free assembly experience for your Beautiful by Drew furniture.
Case Assembly: Step-by-Step Instructions
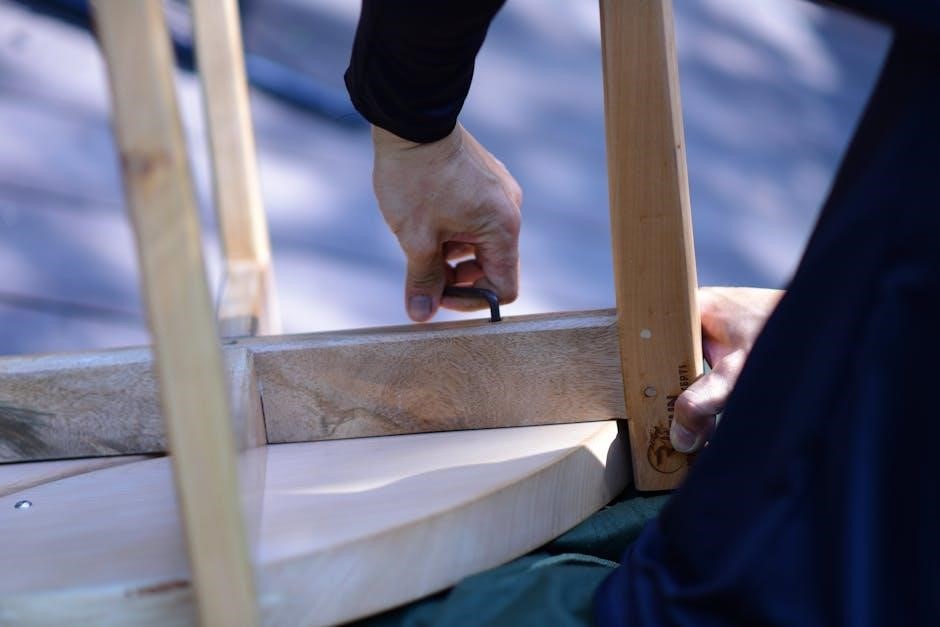
Assembling the case is the foundation of your Beautiful by Drew furniture. Begin by identifying the case components, including the sides, bottom, top, and back panels. Lay the bottom panel flat on your work surface and align the sides with the pre-drilled holes. Use the provided screws to secure the sides to the bottom panel, tightening firmly but avoiding overtightening.
- Attach the back panel to the assembled sides using the same screws. Ensure it is flush with the edges for proper alignment.
- Next, place the top panel over the case structure. Align the pre-drilled holes and secure it with screws, starting from the center to ensure even pressure distribution.
- Double-check all connections for stability and tighten any loose screws.
Use a level to ensure the case is even and adjust as needed. If any gaps appear, gently tap the panels into place. Once the case is assembled, proceed to attach the drawers or doors, following the manual’s guidance. A sturdy case ensures the rest of the assembly will be secure and balanced.
Drawer Assembly: A Detailed Guide
Assembling the drawers for your Beautiful by Drew furniture requires precision to ensure smooth operation. Begin by identifying the drawer components, including the slides, drawer box, and front panel. Attach the drawer slides to the sides of the drawer box using the provided screws, ensuring they are evenly spaced and aligned with the pre-drilled holes.
- Next, attach the opposite side of the drawer slides to the case interior, making sure they align with the screws from the case assembly.
- Assemble the drawer box by attaching the bottom panel to the sides using the shortened screws. Ensure the corners are square and the edges are flush.
- Attach the drawer front panel to the box using hinges or clips, depending on the design. Align the panel carefully to match the case’s aesthetic.
- Test the drawer by sliding it into the case. If it doesn’t glide smoothly, adjust the slide alignment or loosen the screws slightly.
Double-check all connections for stability and ensure the drawer front is securely attached. Proper alignment is crucial for functionality and appearance. Refer to the manual for specific screw types and tightness levels.
Door Assembly: Tips and Tricks
Assembling the doors for your Beautiful by Drew furniture is a critical step that requires attention to detail. Start by identifying the door components, including the hinges, handles, and door panels. Attach the hinges to the door frame using the provided screws, ensuring they are evenly spaced and aligned with the pre-drilled holes.
- Next, attach the opposite side of the hinges to the case interior, aligning them with the hinge plates or screws from the case assembly.
- Install the door handles or knobs by screwing them into the pre-drilled holes on the door front. Ensure they are centered and securely fastened.
- Check the door alignment by gently closing it. If it doesn’t align properly, adjust the hinge screws to achieve the desired fit.
- For glass doors, handle them with care to avoid breakage and ensure the glass is properly secured with the provided clips or adhesive.
Use a spirit level to ensure the door is evenly hung and adjust as necessary. Double-check all hardware for tightness and ensure the door operates smoothly. Proper alignment and secure fastening are key to a professional finish.
Shelf Installation: Aligning and Securing
Installing shelves for your Beautiful by Drew furniture involves careful alignment and secure fastening to ensure stability and functionality. Begin by gathering all shelf components, including the shelf boards, shelf pins, and any additional supports provided.
- Locate the pre-drilled holes in the furniture case for the shelf pins, which are typically found on the interior sides; Insert the shelf pins into these holes, ensuring they are evenly spaced and aligned properly.
- Place the shelf board onto the pins, making sure it rests securely. Use a spirit level to check the alignment and adjust the pins if necessary to achieve an even surface.
- Once the shelf is properly aligned, secure it by tightening the screws provided. Avoid over-tightening to prevent damage to the shelf or the case.
- For additional shelves, repeat the process, ensuring each shelf has its own set of pins and supports. Maintain adequate spacing between shelves based on your storage needs.
- Refer to the manual for weight capacity guidelines to ensure shelves are not overloaded, which could compromise their stability.
Consider optional features like shelf liners or dividers for enhanced organization. Always follow the manufacturer’s instructions for specific shelf installation details to guarantee a sturdy and visually appealing result.
Handle and Knob Installation
Installing handles and knobs is a crucial step in completing the assembly of your Beautiful by Drew furniture. These elements not only enhance the aesthetic appeal but also ensure smooth functionality of drawers and doors.

- Tools Needed: A screwdriver (preferably Phillips head) and possibly a small drill if holes are not pre-drilled.
- Step-by-Step Process:
- Locate the pre-drilled holes on the drawers or doors where the handles or knobs will be attached.
- Align the handle or knob with the holes, ensuring proper orientation and alignment.
- Secure the handle or knob using the provided screws. Start with one screw to maintain alignment, then tighten the others.
- tips:
- Use a template or guide to ensure uniform alignment across multiple drawers.
- Apply a small amount of adhesive to screws to prevent them from loosening over time.
- Safety Considerations: Handle tools with care, and avoid over-tightening to prevent damage to the furniture or stripping of screws.
Upon completing this step, your furniture will not only be functional but also visually appealing, with handles and knobs that complement its design.

Final Assembly Touches
Once all major components are assembled, it’s time to add the final touches to ensure everything is secure, aligned, and visually appealing. This step is crucial for both functionality and aesthetics.
- Double-Check All Parts: Ensure all drawers, doors, shelves, and handles are properly aligned and securely attached.
- Tighten All Screws: Go through the entire assembly and tighten any loose screws or bolts. This prevents wobbling or instability over time.
- Alignment Check: Verify that drawers open and close smoothly and that doors hang evenly. Adjust hinges or drawer slides if necessary.
- Add Protective Pads: Place felt or silicone pads on the bottom of shelves or drawers to prevent scratching and reduce noise.
This step ensures your Beautiful by Drew furniture is not only functional but also looks professional and well-crafted. Take your time to make sure every detail is perfect before declaring the assembly complete.
Cleaning and Inspection Before Use
Before putting your Beautiful by Drew furniture to use, it’s essential to clean and inspect it thoroughly. This step ensures that the furniture is free from dust, debris, and any assembly residues, while also verifying that all components are in perfect condition.
- Clean Surfaces: Use a soft, dry cloth to wipe down all surfaces. For stubborn spots or stains, a mild detergent diluted in water can be applied, but avoid harsh chemicals or abrasive cleaners that might damage the finish.
- Inspect for Damage: Check all parts for any scratches, dents, or misalignments that may have occurred during assembly or unpacking. Address any issues before use to prevent further damage.
- Test Functionality: Open and close drawers and doors repeatedly to ensure smooth operation; Check that shelves are level and securely fastened.
- Remove Packaging Residue: Peel off any protective films or stickers from glass, metal, or plastic components, and dispose of them properly.
This step ensures your furniture is not only clean but also safe and ready for everyday use. Take your time to inspect every detail, as it contributes to the durability and longevity of your Beautiful by Drew piece.
Troubleshooting Common Issues
During the assembly or use of your Beautiful by Drew furniture, you may encounter minor issues. Addressing these promptly ensures optimal performance and longevity of your piece. Below are some common problems and their solutions:
- Wobbly Shelves or Cabinets: Check if all screws and bolts are tightened evenly. Ensure the furniture is placed on a level surface. If instability persists, adjust the leveling feet or use shims under the legs.
- Misaligned Doors or Drawers: Verify that all hinges and slides are properly aligned and securely fastened. Adjust the hinges by loosening the screws slightly and realigning before tightening them again.
- Scratches or Marks: Minor scratches can be touched up with furniture touch-up pens or wax sticks. For deeper marks, contact customer support for repair options.
- Sticking Drawers: Apply a small amount of silicone-based lubricant to the drawer slides. Wipe off any excess to avoid attracting dust.
Most issues can be resolved with simple adjustments or minor repairs. If a problem persists, refer to the warranty information or contact customer support for assistance. Regular maintenance and careful handling will help prevent these issues from arising.
Styling Your Beautiful by Drew Furniture
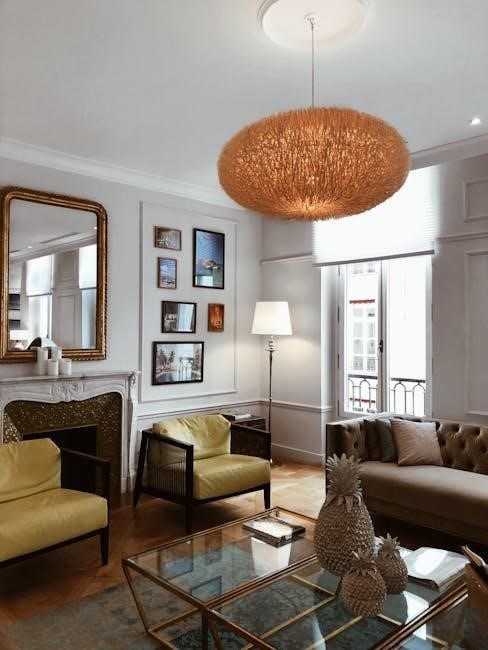
Styling your Beautiful by Drew furniture is the final step in bringing your space to life. Start by selecting a color palette that complements the furniture’s finish, whether it’s neutral tones, rich woods, or bold accents. Add throw pillows, blankets, or rugs in coordinating hues to create a cohesive look. Lighting plays a crucial role—use table lamps, floor lamps, or string lights to highlight the furniture’s design and create ambiance.
- Accessorize with decorative items like vases, artwork, or plants to add personality to the space.
- Mix textures by combining smooth surfaces with woven baskets or soft fabrics for depth and visual interest.
- Experiment with layouts to find a configuration that enhances functionality and aesthetics, such as creating a conversational circle or focal point.
Remember, the key to styling is balance. Let the furniture be the star while adding subtle accents that reflect your personal taste. This approach ensures your Beautiful by Drew furniture becomes the centerpiece of a beautifully curated room.
Maintenance and Care Tips
To ensure your Beautiful by Drew furniture remains in pristine condition, regular maintenance and proper care are essential. Start by dusting surfaces with a soft, dry cloth to prevent particle buildup. For tougher stains or spills, use a mild detergent diluted in water, but avoid harsh chemicals or abrasive cleaners that could damage finishes. Always test a small, inconspicuous area first to ensure the cleaning solution won’t cause discoloration.
- Protect surfaces from direct sunlight to prevent fading or warping.
- Use coasters or mats under glasses and dishes to guard against water marks and spills.
- Avoid placing hot objects directly on surfaces; use trivets or heat-resistant pads instead.
- For wooden pieces, consider applying a furniture wax or polish periodically to maintain the finish.

Keep the furniture away from extreme humidity or temperature fluctuations. By following these care tips, you’ll extend the lifespan of your Beautiful by Drew furniture and preserve its beauty for years to come.
Warranty and Customer Support Information
Your Beautiful by Drew furniture is backed by a limited warranty that covers defects in materials and workmanship for a specified period. This warranty is designed to protect your investment and ensure your satisfaction. For detailed terms and conditions, refer to the warranty document provided with your purchase or visit the official website.
- The warranty typically covers manufacturing defects for a period of 1-5 years, depending on the product.
- Damage caused by improper assembly, misuse, or normal wear and tear may not be covered.
- For any warranty-related inquiries or claims, contact the customer support team via phone, email, or live chat.
Beautiful by Drew also offers dedicated customer support to assist with assembly questions, maintenance tips, or product-related concerns. Visit their official website for contact details, FAQs, and additional resources. To ensure your warranty remains valid, retain your purchase receipt and follow all care instructions provided in this manual.
Congratulations! You’ve successfully completed the assembly process for your Beautiful by Drew furniture. This manual has guided you through every step, ensuring a seamless and enjoyable experience. By following the instructions carefully, you’ve transformed individual components into a stunning piece of furniture that will enhance your home.
This furniture is designed to last, with attention to detail and high-quality materials. Take pride in knowing you’ve assembled it yourself, adding a personal touch to your space. Whether it’s a statement piece or a functional addition, it’s now ready to complement your decor and serve its purpose for years to come.
- Remember to reference this manual for future adjustments or maintenance.
- Enjoy the satisfaction of creating something beautiful and functional with your own hands.
If you have any further questions or need assistance, don’t hesitate to reach out to Beautiful by Drew’s customer support team. Happy decorating, and enjoy your new furniture!