

This guide provides essential instructions for installing and wiring the Aprilaire 600 humidifier․ Proper wiring ensures efficient operation, safety, and optimal performance of the system․
1․1 Overview of the Aprilaire 600 Humidifier
The Aprilaire 600 is a bypass-style whole-house humidifier designed to provide consistent humidity levels in homes․ It is compatible with various heating systems, including forced air and heat pumps, ensuring efficient operation during heating seasons․ The humidifier features a simple yet robust design, making it a reliable choice for maintaining indoor air quality․ Its bypass configuration allows for easy installation and integration with existing HVAC systems․ The Aprilaire 600 is known for its quiet operation and low water usage, making it a popular option for homeowners seeking to improve comfort and reduce static electricity․ Proper installation and wiring are crucial to ensure optimal performance and safety․ This guide will walk you through the essential steps to install and wire the Aprilaire 600 humidifier effectively․
1․2 Importance of Proper Wiring
Proper wiring for the Aprilaire 600 humidifier is crucial to ensure safe, efficient, and reliable operation․ Incorrect wiring can lead to electrical hazards, such as shocks or fires, especially since the humidifier involves water and electricity․ It can also cause the system to malfunction, leading to inefficient humidity control, which may result in over-humidification or under-humidification․ This can cause issues like mold growth or dry air, affecting indoor comfort and air quality․ Additionally, improper wiring can damage the humidifier’s components, leading to costly repairs or early replacement․ Correct wiring ensures the humidifier integrates properly with the HVAC system, operates energy-efficiently, and maintains accurate humidity levels․ It also simplifies troubleshooting and maintenance, ensuring the system meets safety standards and functions as intended․ Following the manufacturer’s wiring guidelines is essential to avoid these potential problems and ensure optimal performance․
1․3 Legal and Safety Considerations
When working with the Aprilaire 600 wiring, it is essential to adhere to all local electrical codes and safety standards․ Improper installation can lead to legal issues, void warranties, and create significant safety risks․ Always turn off the power supply before handling any electrical components to prevent shocks or injuries․ Ensure that all connections are secure and meet the manufacturer’s specifications․ Failure to follow safety guidelines can result in fire hazards, electrical malfunctions, or damage to the humidifier․ Additionally, improper wiring may violate local regulations, leading to fines or legal consequences․ It is highly recommended to consult a licensed electrician if you are unsure about any aspect of the wiring process․ Proper adherence to safety protocols ensures a safe and reliable operation of the Aprilaire 600 humidifier․ Always refer to the user manual for specific safety precautions and legal requirements․

Installation Guide for Aprilaire 600
The Aprilaire 600 installation requires careful planning and adherence to manufacturer guidelines․ Ensure proper mounting, electrical connections, and system integration for optimal performance and safety․
2․1 Step-by-Step Installation Instructions
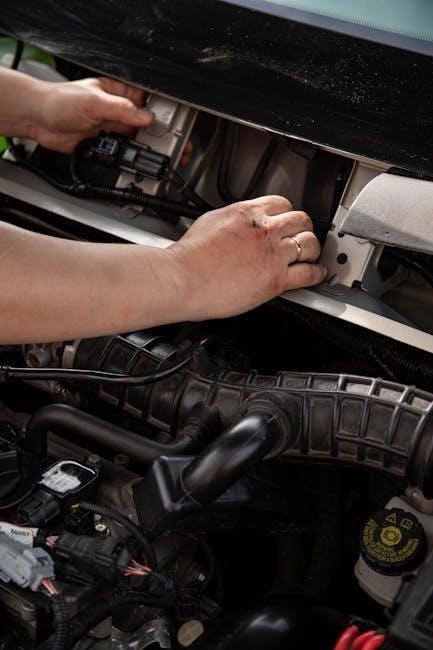
Begin by turning off the power to your HVAC system․ Mount the humidifier on a level surface near the furnace, ensuring easy access for future maintenance․ Connect the water supply line to the inlet valve and secure it properly․ Next, attach the drain line to the humidifier and direct it to a nearby drain․ Install the humidistat or control unit according to the manufacturer’s instructions․ Wire the humidifier to your furnace, following the wiring diagram provided in the manual․ Finally, test the system by running the furnace and checking for proper water flow and misting․ Refer to the user manual for detailed instructions and safety precautions․
2․2 Recommended Mounting Locations
Mount the Aprilaire 600 humidifier near your furnace for optimal performance․ Choose a level surface to ensure proper water distribution and drain operation․ Install it on the supply or return side of your HVAC system, depending on your setup․ Ensure the location allows easy access for maintenance and avoids obstructing airflow․ The humidifier should be positioned near a water supply line and a drain to simplify installation․ Avoid areas prone to freezing or excessive moisture․ For best results, follow the manufacturer’s guidelines for installation height and clearance․ Proper placement will ensure efficient operation and extend the lifespan of your humidifier;
2․3 System Checkout Procedures
After installation, perform a system checkout to ensure proper operation․ Start by verifying all electrical connections are secure and meet local codes․ Check the water supply line for leaks and ensure the drain is functioning correctly․ Test the humidifier by turning on the furnace and humidistat to confirm operation․ Verify that water flows through the system and mist is visible at the outlet; Inspect the in-line strainer for blockages and clean or replace it if necessary․ Ensure the control board lights up and responds to settings․ Finally, review the system’s performance over a few cycles to ensure consistent operation․ Refer to the manual for detailed checkout instructions and troubleshooting tips to address any issues promptly․

Wiring Diagrams for Aprilaire 600
Wiring diagrams provide a clear visual guide for installing and troubleshooting the Aprilaire 600 humidifier․ They outline connections for proper furnace operation and control setup, ensuring safety and efficiency․
3․1 Understanding the Wiring Diagram
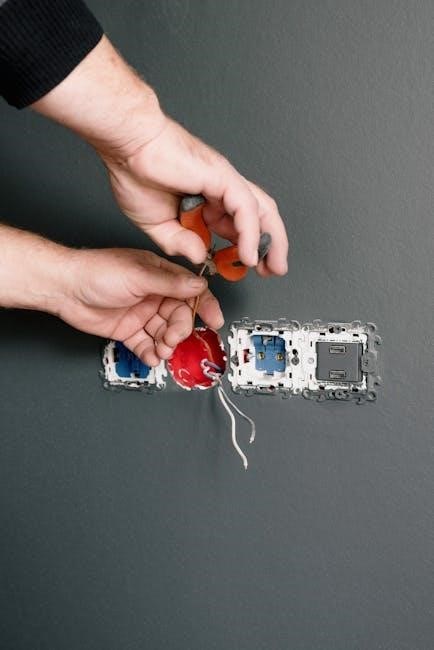
Understanding the Aprilaire 600 wiring diagram is crucial for proper installation․ It illustrates the electrical connections between components like the humidifier, furnace, and control board․ The diagram highlights power supply lines, sensor connections, and communication wires․ Color-coded wires simplify identification: red for 24V power, black for neutral, and yellow for transformer connections․ The wiring diagram also shows how to integrate the humidifier with your HVAC system, ensuring it operates in sync with your furnace․ Proper interpretation prevents electrical issues and ensures efficient operation․ Always refer to the diagram for troubleshooting or repairs, as incorrect wiring can lead to system malfunctions or safety hazards․
3․2 Wiring Recommendations for Furnace Operation
Proper wiring is essential for integrating the Aprilaire 600 with your furnace․ The system requires a 24V power supply, typically sourced from the furnace transformer․ Connect the humidifier’s control board to the furnace’s fan and heat terminals to ensure synchronized operation․ Use 18-22 AWG wires for all connections, and avoid mixing signal and power wires to prevent interference․ The wiring harness should be securely fastened to prevent damage․ For furnace operation, the Aprilaire 600 uses a simple two-wire connection to monitor furnace activity․ Ensure all connections are tight and insulated to avoid short circuits․ Refer to the wiring diagram for specific terminal assignments․ Proper installation ensures the humidifier activates only when the furnace is running, maintaining optimal humidity levels and energy efficiency․ Always follow local electrical codes and safety guidelines during installation․
3․3 Differences Between Model 600 and 600M Wiring
The Aprilaire 600 and 600M models have distinct wiring requirements due to their control systems․ The Model 600 features a digital control, requiring additional wiring for humidity sensors and remote operation, while the 600M uses a manual control with simpler wiring focused on basic operations․ The 600 connects to the furnace via a two-wire setup for operation sensing, whereas the 600M may require a dedicated 24V power supply․ Both models share similar furnace integration principles but differ in complexity․ The 600’s wiring supports advanced features like automatic shutdown, while the 600M prioritizes straightforward, manual adjustments․ Always refer to the specific wiring diagram for each model to ensure compatibility and proper installation․ These differences are crucial for achieving optimal performance and safety in your humidification system․
Humidifier Controls and Wiring
This section explains the installation and setup of both manual and digital controls for the Aprilaire 600, ensuring proper wiring and seamless functionality for optimal performance․
4․1 Manual Control (Model 600M) Wiring
The Model 600M manual control offers straightforward wiring for the Aprilaire 600 humidifier․ It can be mounted in the return duct or on the furnace, ensuring easy access for adjustments․ The wiring process involves connecting the control to the humidifier and furnace, typically requiring a 24VAC power source․ Ensure all connections are secure and follow the recommended wiring diagram to avoid electrical issues․ After installation, test the system to confirm proper operation․ Always refer to the user manual for specific instructions and troubleshooting guidance․ This setup provides a reliable and user-friendly solution for controlling humidity levels in your home․
4․2 Digital Control (Model 600) Wiring
The Aprilaire Model 600 digital control offers advanced humidity management with precise settings․ Wiring involves connecting the control to the humidifier and furnace, using color-coded terminals for easy identification․ The control typically requires a 24VAC power source from the transformer․ Connect the orange wire to the humidifier’s fan, and the yellow wire to the furnace’s blower․ Mount the control in a convenient location, ensuring proper line of sight for the humidity sensor․ Follow the wiring diagram to avoid errors․ After installation, program the control according to your preferences․ Regularly check and clean the sensor for accurate readings․ This digital setup ensures efficient and customizable humidity control, enhancing indoor air quality and comfort year-round․

4․3 Automatic Humidifier Control Setup
The automatic humidifier control for the Aprilaire 600 ensures precise humidity levels by automatically adjusting operation based on outdoor temperatures․ This feature eliminates manual adjustments, optimizing comfort and energy efficiency․ To set up the automatic control, install the outdoor temperature sensor in a shaded area, away from direct sunlight and moisture․ Connect the sensor to the control board, following the wiring diagram for proper terminal connections․ Configure the control settings according to your desired humidity levels and regional climate․ The system will automatically regulate moisture output, preventing over-humidification and ensuring consistent indoor air quality․ Regularly inspect and clean the sensor to maintain accuracy․ This advanced setup enhances performance, reduces maintenance, and provides a seamless user experience for optimal humidity management year-round․
Troubleshooting Common Wiring Issues
Identify wiring issues by checking connections, fuses, and sensors․ Verify power supply and consult the manual for fault codes․ Resolve issues promptly to ensure system functionality and safety․
5․1 Identifying and Solving Electrical Problems
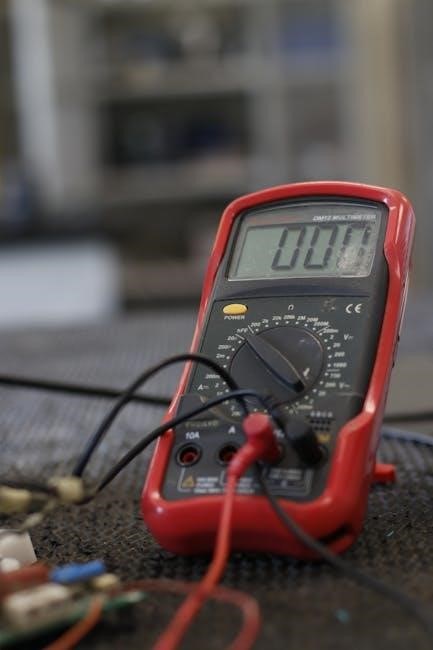
Begin by inspecting all wiring connections for looseness or damage․ Use a multimeter to check for proper voltage at the humidifier’s control board․ Ensure the circuit breaker or fuse is intact․ If issues persist, consult the Aprilaire 600 wiring diagram to trace connections․ Verify that the transformer is functioning correctly and that all sensors are clean and free of debris․ Addressing electrical problems promptly prevents system malfunctions and ensures reliable operation․ Always turn off power before making any repairs to avoid safety hazards․ If unsure, contact a licensed electrician for assistance․ Regular maintenance can help prevent many common electrical issues, ensuring your Aprilaire 600 operates efficiently year-round․
5․2 Resetting the Control Board
To reset the Aprilaire 600 control board, first ensure the system is powered off at the circuit breaker․ Locate the control board, typically found near the humidifier or furnace․ Disconnect the power supply and wait for 30 seconds to allow any stored power to discharge․ Reconnect the power and turn the circuit breaker back on․ If the issue persists, inspect the control board for visible damage or loose connections․ Clean any debris from sensors and ensure all wires are securely connected․ If resetting does not resolve the problem, refer to the wiring diagram or contact a professional for further assistance․ Regular resets can help maintain optimal performance and address minor electrical glitches effectively․
5․3 Checking and Replacing Fuses
Start by locating the fuse holder, typically found in the control board or near the humidifier’s power supply․ Turn off the power to the system at the circuit breaker before proceeding․ Use a multimeter to test the fuse for continuity․ If the fuse is blown, disconnect it carefully and replace it with a new one of the same rating․ Ensure the replacement fuse matches the specifications provided in the Aprilaire 600 manual․ After replacing, restore power and test the system to confirm proper operation․ If the fuse blows again, inspect for underlying issues such as short circuits or overloaded components․ Regularly checking and maintaining fuses ensures reliable performance and prevents unexpected shutdowns; Always follow safety guidelines when handling electrical components to avoid risks․
Maintenance and Upkeep
Regular maintenance ensures optimal performance and longevity of the Aprilaire 600․ Clean the in-line strainer, flush it, and replace it as needed․ Schedule annual inspections to maintain efficiency and functionality․
6․1 Cleaning the In-Line Strainer
Cleaning the in-line strainer is crucial for maintaining proper water flow and humidifier performance․ Start by locating the strainer, typically found near the inlet valve․ Use a small nail or wire to carefully remove it from the housing․ Once removed, rinse the strainer under warm water or soak it in a mild detergent solution to dissolve mineral buildup․ For stubborn debris, gently scrub with a soft brush․ After cleaning, flush the strainer thoroughly to ensure all residue is removed․ If the strainer is damaged or heavily corroded, replace it with a new one․ Reinstall the strainer securely to prevent leaks․ Regular cleaning ensures optimal water flow and prevents clogs, which can disrupt humidifier operation․ Repeat this process every 1-3 months, depending on water usage and hardness․
6․2 Flushing and Replacing the Strainer
Flush the in-line strainer annually or as needed to remove mineral buildup and debris․ Start by disconnecting the water supply and draining the system․ Remove the strainer from the inlet valve using a small nail or wire․ Soak it in a mixture of warm water and mild detergent, then scrub gently with a soft brush to remove stubborn deposits․ Rinse thoroughly and reinstall if still in good condition․ If the strainer is damaged or corroded, replace it with a new one to ensure proper water flow․ After reinstalling, check for leaks and ensure the system operates smoothly․ Regular flushing and replacement prevent clogs and maintain optimal humidifier performance․ This simple maintenance step is essential for prolonging the life of your Aprilaire 600 and ensuring consistent humidity control․
6․3 Annual Maintenance Schedule
Performing annual maintenance ensures the Aprilaire 600 operates efficiently and effectively․ Start by inspecting the wiring and connections to ensure they are secure and free from damage․ Clean the humidifier thoroughly, paying attention to the water panel and distribution tray․ Check the water flow and drain system for proper function, ensuring no blockages or leaks․ Inspect and replace the in-line strainer if necessary to maintain water quality․ Additionally, verify the humidity settings and adjust them according to your preferences․ Finally, refer to the user manual for any model-specific maintenance recommendations․ By following this annual schedule, you can prevent potential issues, reduce mineral buildup, and extend the lifespan of your Aprilaire 600 humidifier․ Regular upkeep ensures consistent performance and optimal indoor air quality throughout the year․